
Table of Contents
Chocolate Glaze & Royal Icing
Very often you hear people talk about glaze and icing as if they were the same thing. In reality they are two different preparations, each with its own name and a specific use in pastry.
Both are sugar-based and are used to decorate baked goods and modern cakes, but they differ in texture and structure:
- when we talk about a glaze we usually mean a soft mixture, typically made with chocolate or cocoa, sugar and, in more technical versions, also gelatin or fats (butter, cream, oil). It is perfect for coating cakes, panettone and modern desserts with a smooth, shiny and delicious finish;
- icing (royal icing or water icing), on the other hand, once dry has a firm and crunchy texture, like the one used to decorate cookies. It is made by mixing powdered sugar with water or egg whites.
Within the icing family you can distinguish two main preparations.
Water icing
Water icing has a very fluid consistency and is ideal for glazing freshly baked goods. It tends to run slightly and then set as it cools. As a general rule, the basic proportions are:
- 100 g powdered sugar
- 10 g water
Royal icing
Compared to water icing, royal icing has a texture similar to meringue and dries very quickly. It is used for decorating cookies, chocolate eggs and small decorative details that need to hold their shape. The base is egg white and the proportions are:
- 30 g egg white
- 300 g powdered sugar
- 5 g lemon juice


Ingredients for a perfect chocolate glaze
To achieve a shiny, smooth and even chocolate glaze, it’s essential to balance sugars, fats and gelling agents properly. Each ingredient plays a specific role in the recipe.
Granulated sugar, glucose syrup and sweetened condensed milk add sweetness and “solids” to the glaze. The right amount of sugar prevents the glaze from freezing completely when it comes into contact with a frozen dessert. Glucose syrup is essential for the right elasticity, to prevent crystallization and to help the glaze flow evenly over the cake.
Heavy cream and couverture chocolate provide the fats, which create a soft, melt-in-the-mouth texture. Together with the gelatin, they help the glaze set and give structure to the coating once it has been poured over the dessert.
Gelatin, together with the fats, is responsible for the correct “set” of the glaze. In recipes you can use different forms of gelatin:
- Gelatin sheets (leaf gelatin): they must be soaked in cold water until they absorb about 5 times their weight (for example, 10 g of gelatin sheets will weigh about 50 g once hydrated).
- Powdered gelatin: it can be dissolved directly in the hot liquid of the recipe. As a general rule, 1 g of sheet gelatin is equivalent to about 2.5 g of powdered gelatin, so you can adjust the quantities accordingly.
- Gelatin mass: this is a very common professional preparation made from 1 part soaked gelatin and 7 parts water. Once ready, it keeps in the refrigerator for 3–4 days and can be used directly in the recipe without having to soak the sheets each time. If you want to learn more about gelatin and agar agar, read here.
Food coloring is used to customize the color of the chocolate glaze, especially for mirror glaze recipes. In the past, powdered colors were used most often, but today I recommend the more practical and concentrated gel food colors, which dissolve easily in the glaze base. For an even more eye-catching finish, you can add edible glitter and sprinkles, perfect for creating modern, glossy chocolate glazes.
How to make a shiny chocolate glaze
Before you start, you can find the full shiny chocolate glaze recipe here. Once all the ingredients are ready, you just need to follow a few steps to get a smooth, even glaze with no air bubbles.
- Prepare the syrup. In the basic chocolate glaze recipe, the syrup is made from water, sugar and glucose. Heat everything to 105°C (about 221°F): this allows part of the free water to evaporate so you get the right density and better shelf life for the glaze.
- Add the chocolate. Finely chop the couverture chocolate (or use chocolate chips) and place it in a tall, narrow container. Pour the hot syrup over the chocolate, preferably through a fine mesh strainer to remove any impurities or film. The tall container helps limit the formation of air bubbles.
- Emulsify correctly. Use an immersion blender, working deep in the mixture and keeping the blender slightly tilted. Move it from the bottom to the top without incorporating air: this step is crucial for a shiny chocolate glaze and a perfectly smooth surface on the dessert.
- Strain the glaze. Once the chocolate and syrup are fully emulsified, strain the glaze again through a fine sieve to remove any remaining air bubbles and achieve a more even texture.
- Let it rest in the refrigerator. Resting time is essential for a true mirror glaze. Cover the surface with plastic wrap in contact and let it mature in the refrigerator at about 4°C (39°F) for around 24 hours. Skipping this step will make the glaze less uniform and it will not adhere as well to the dessert.
- Bring it to glazing temperature. Before using, reheat the glaze and bring it to about 35°C (95°F). The dessert you are glazing (mousse cake or semifreddo) should be well frozen, around -18°C (0°F). This temperature contrast allows the glaze to set immediately, creating a smooth, shiny and flawless coating.
Making chocolate glaze with a Thermomix
If you have a Thermomix, you can prepare shiny chocolate glaze very easily and with great control, doing the entire process directly in the bowl.
- Place the cream, sugar and glucose in the bowl and heat the mixture to 105°C (about 221°F), setting the speed to 2–3.
- Once it reaches temperature, add the chopped chocolate and blend at speed 10 for 1 minute, until you get a perfectly emulsified base.
- Then add the soaked gelatin (or the gelatin mass) and blend for another 1 minute at speed 8–9.
- At this point the glaze is ready to be strained, transferred to a container, covered with plastic wrap in contact and left to mature in the refrigerator for about 24 hours.
- The same method can be used for a cocoa glaze: in that case, blend for about 1½ minutes after adding the cocoa to the hot syrup.
Chocolate glaze for cakes, cookies and panettone
Starting from the basic shiny chocolate glaze recipe:
- 300 g chocolate
- 150 g water
- 300 g glucose syrup
- 300 g granulated sugar
- 200 g sweetened condensed milk
- 28 g gelatin, soaked
you can adjust the texture to adapt it for cakes and cookies. For chocolate-glazed panettone, instead, it’s better to use a specific chocolate glaze with a dedicated formula.
Chocolate glaze for cakes and mousse cakes
For baked cakes and modern mousse cakes, the ideal is a soft, velvety chocolate glaze that stays slightly creamy when sliced.
- Start from your basic shiny chocolate glaze recipe.
- Add 50 g heavy cream (replacing part of the water): you can reduce the water from 150 g to 120 g and add 30 g cream, so you get a creamier glaze without making it too fluid.
- Use the glaze at around 30–35°C (86–95°F) on well-chilled cakes or frozen mousse cakes at -18°C (0°F), to get a smooth, shiny and even surface.
Chocolate glaze for cookies
For cookies, you want a slightly drier, firmer chocolate glaze that sets on the surface without staying too soft.
- Start from the basic recipe, but reduce the water from 150 g to 100 g, so the glaze becomes thicker.
- If you want an even drier finish, you can slightly increase the granulated sugar from 300 g to 320–330 g.
- Glaze the cookies when they are completely cool, spreading a thin layer: this way the glaze dries faster and doesn’t overpower the flavor of the cookie.
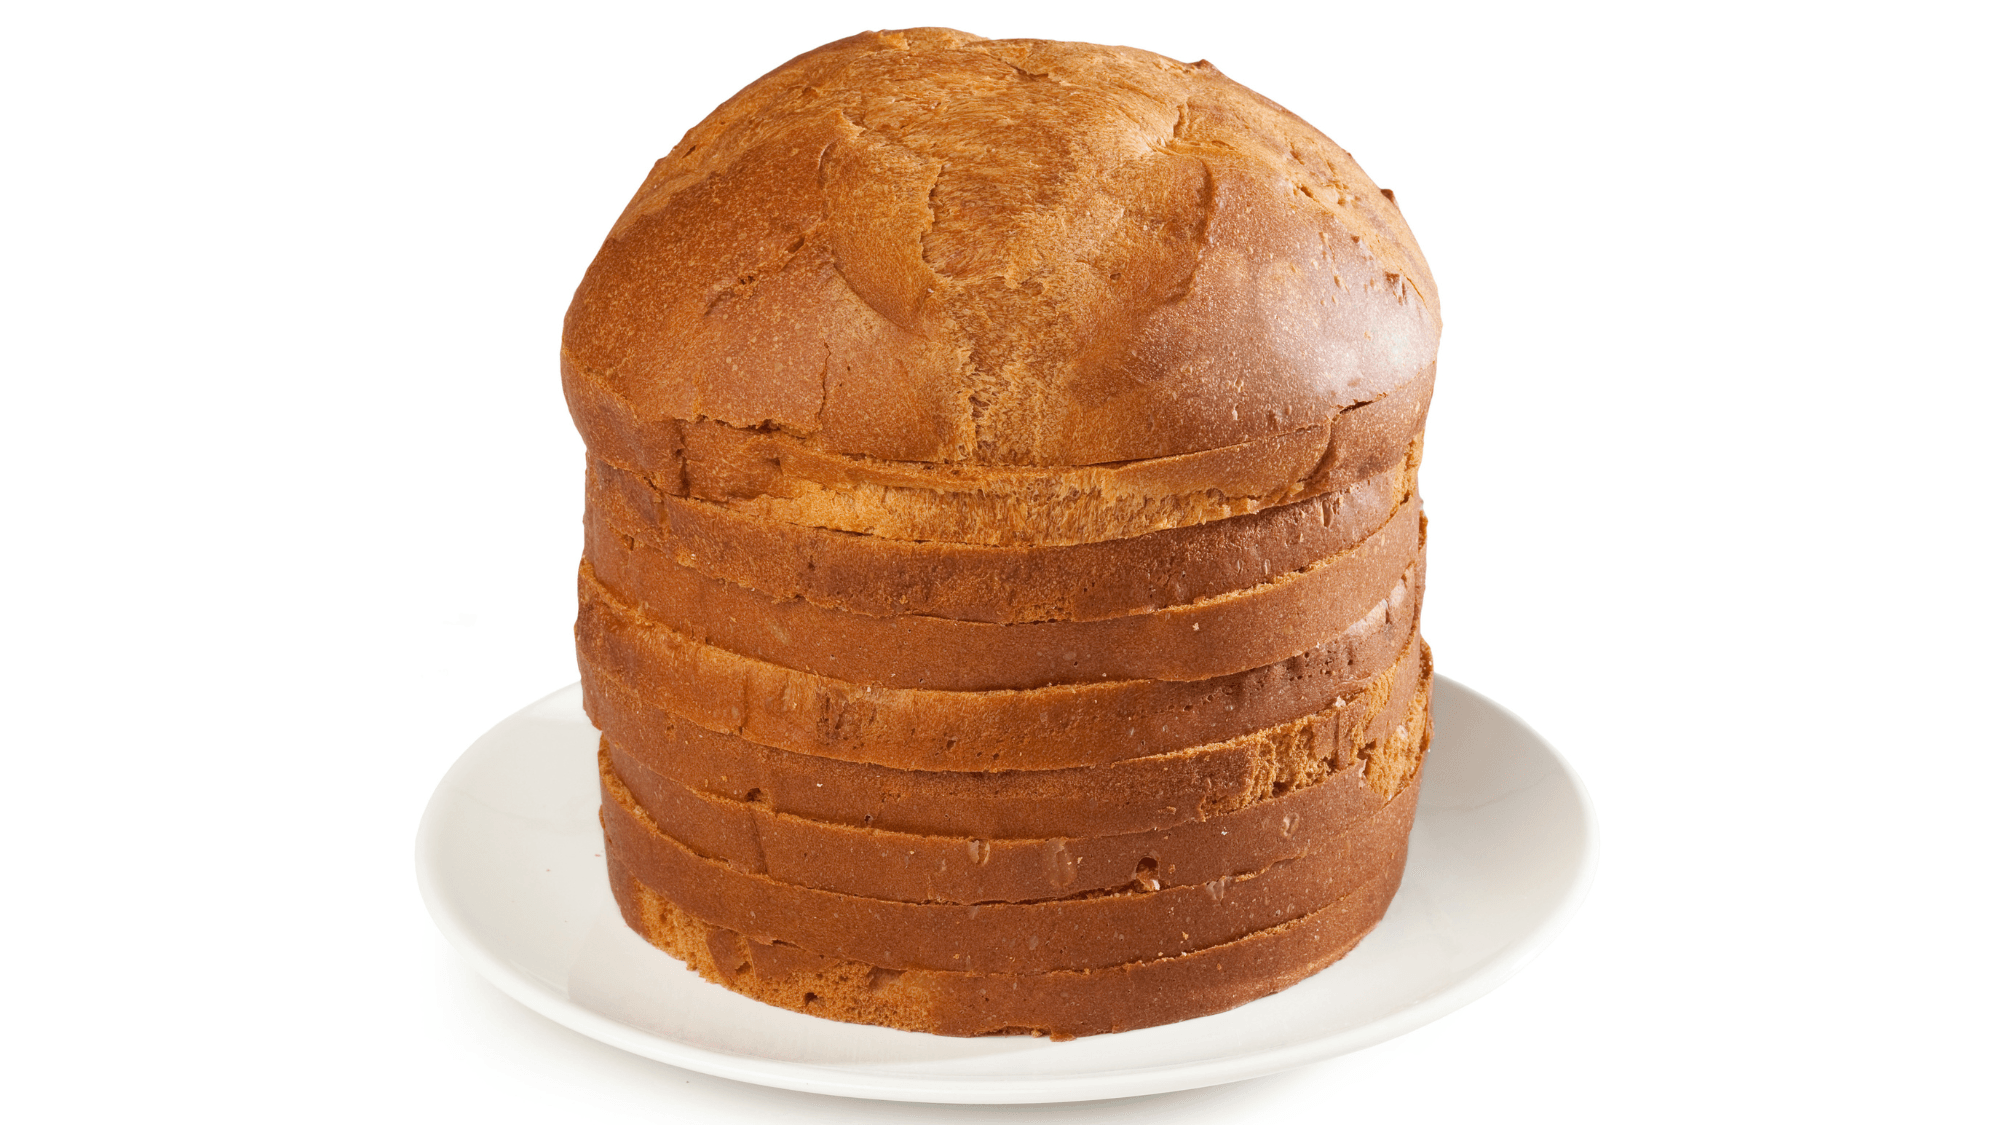
Chocolate glaze for panettone
For panettone and other large leavened cakes, it’s best to use a specific chocolate glaze, with a drier structure, a higher percentage of chocolate and a touch of alcohol, which helps both shine and shelf life.
A reliable chocolate glaze recipe for panettone is:
- 360 g dark chocolate 70%
- 145 g granulated sugar
- 145 g water
- 45 g glucose syrup
- 25 g food-grade alcohol
In this case, the high percentage of dark chocolate and the presence of food-grade alcohol create an intense, glossy glaze with excellent adherence on the surface of the panettone, without running too much down the sides.
The panettone should be glazed when it is completely cool: place it on a wire rack and pour the glaze starting from the center of the dome, gently guiding it toward the edges to create an even layer. Once set, you’ll get a thin, elegant and very aromatic finish.

How to glaze a chocolate cake
For a perfect glaze, the cake should be covered evenly with a thin layer of chocolate glaze, with no air bubbles and no bare spots. A smooth, even coating is the first secret to achieving a truly professional result.
If you need to glaze a frozen dessert (such as a mousse cake or semifreddo), always start by unmolding the cake and placing it on a cooling rack or ring, with a tray or pan underneath to catch the excess glaze. Before pouring the glaze, it’s a good idea to gently blot the surface with a sheet of paper towel to remove any condensation: this small trick helps prevent the formation of air bubbles.
For best results, chocolate glaze should be used at around 35°C (95°F), and you shouldn’t be stingy with it: it’s almost impossible to glaze a cake properly if you use too little glaze. Pour the glaze starting from the center of the cake and work your way towards the edges, gradually reducing the amount as you get closer to the sides.
If you need to even out the thickness of the glaze, you can use a clean offset spatula or pastry spatula, working with light, gentle movements. As an extra trick, you can also use a hairdryer set to warm air: the gentle heat helps keep the glaze at the ideal temperature and makes it flow without leaving spatula marks on the surface.
Once you’ve finished glazing, let the excess glaze drip off for a few minutes. Then clean up the base of the cake, removing any “tails” of glaze with the help of a spatula. The glazed cake can be stored in the refrigerator at about 4°C (39°F) or, if necessary, frozen again at -18°C (0°F), making sure to let it thaw slowly in the refrigerator before serving.

Spider effect (spiderweb) chocolate glaze
The spider effect glaze (or spiderweb glaze) is a dramatic decoration created by “streaking” a chocolate mirror glaze with a thin layer of warm tinted neutral glaze, slightly hotter than the chocolate glaze underneath.
Because neutral glaze contains no fat, it flows over the surface of the chocolate glaze (which is fat-based), creating the classic spiderweb pattern. For a truly striking effect, it’s best to choose two strongly contrasting colors.
For a successful spider effect, follow these steps:
- Prepare the chocolate mirror glaze and tint the neutral glaze with the gel food color of your choice.
- Heat the mirror glaze to about 40°C (104°F), then briefly emulsify it with an immersion blender (without incorporating air) to even out the temperature and bring it back down to around 35°C (95°F), ideal for glazing.
- Heat the neutral glaze you’ll use for the spiderweb to about 40°C (104°F), so it is fluid but not boiling.
- Glaze the dessert with the mirror glaze and immediately dip a spatula into the colored neutral glaze; very gently drag the spatula across the surface of the dessert. The final effect will depend on how much neutral glaze you use, its temperature (the hotter it is, the more it flows) and how much pressure you apply with the spatula.
How to store chocolate glaze
Once prepared, chocolate glaze keeps very well and can be reused. You can store it:
- in the refrigerator for 2–3 days, well covered with plastic wrap in contact and placed in an airtight container;
- in the freezer for up to 6 months, always protected from air.
Chocolate glaze, however, has a strong tendency to absorb odors from the refrigerator, so be very careful, otherwise you risk ending up with a cake that has an odd aftertaste.
If possible, the best way to store it is in vacuum-sealed bags, which protect it from air and any external odors.
Conclusion
A well-made chocolate glaze can turn a good dessert into one that is both delicious and visually stunning. Glazing and the spider effect are techniques that anyone can master, as long as you follow a few key rules: correct temperatures, proper resting time in the refrigerator, and a smooth emulsion without air bubbles.
Now it’s your turn to get baking, prepare your chocolate glaze and let your creativity run free to create modern cakes, plated desserts and single-serving entremets with real impact.


3 comments available
Wow, questa ricetta di glassa al cioccolato sembra davvero deliziosa! Non vedo l’ora di provarla e di sperimentare con le varianti suggerite. Grazie per aver condiviso questi consigli utili!
Ho provato la ricetta della glassa al cioccolato e sono rimasta stupefatta dalla sua semplicità e dal sapore intenso! Ho anche sperimentato alcune varianti con il caffè e la vaniglia, e sono state un successone! Grazie per condividere una ricetta così deliziosa!
Grazie! Sono felice che la ricetta ti sia piaciuta!