
A very popular question is how to make sourdough starter at home. Making Sourdough at home is pretty simple because very few ingredients are needed: water, Flour, and Air! Let me explain how to make sourdough at home… easily!
It is often recommended to use a starter, an ingredient (such as fruit pulp, white yogurt, or honey) capable of triggering fermentation. Still, you risk introducing many bacteria that could make our yeast too sour.
On the contrary, we will see how to use only flour (but of good quality) to start our yeast. If flour is already available, all the substances (such as sugars, proteins, and mineral salts) must initiate a “healthy” fermentation.
Yes, the real starting point is to create a small community of yeasts and bacteria, which will become larger daily!
The time needed to bring the Sourdough starter to proper maturity is about 15 days. Still, it will depend on many factors:
- The flour used
- The temperature in your kitchen
- Even the microorganisms present in the air of your home
So don’t worry; if your sourdough starter doesn’t entirely respect the schedule, we’ll give it… Maybe it will be lazier or more vigorous than your friends’ one!
Before you start, consider the main fermentation methods: sourdough vs yeast, Levain and Biga.
HERE ‘S HOW TO MAKE SOURDOUGH STARTER AT HOME
Day 1
The essential step is to capture the yeast and bacteria in the air and “invite” them to interact with a world made for them, precisely the dough from which we will start. It contains everything these microorganisms need: food and water!
Knead then;
- 150 grams of Wholemeal or Semi-Wholemeal Flour
- 75 gr. of Plain Water (better if bottled)
- 1 gram of Salt
Once all the ingredients have been mixed, place the dough in a clean jar, cover it with gauze or paper towels held by a rubber band, and let it ferment for 24/36 hours at 25°C.
In this first phase, you will not observe any dough growth. Still, inside it will be formed the first population of yeasts and bacteria used to start the future fermentation.
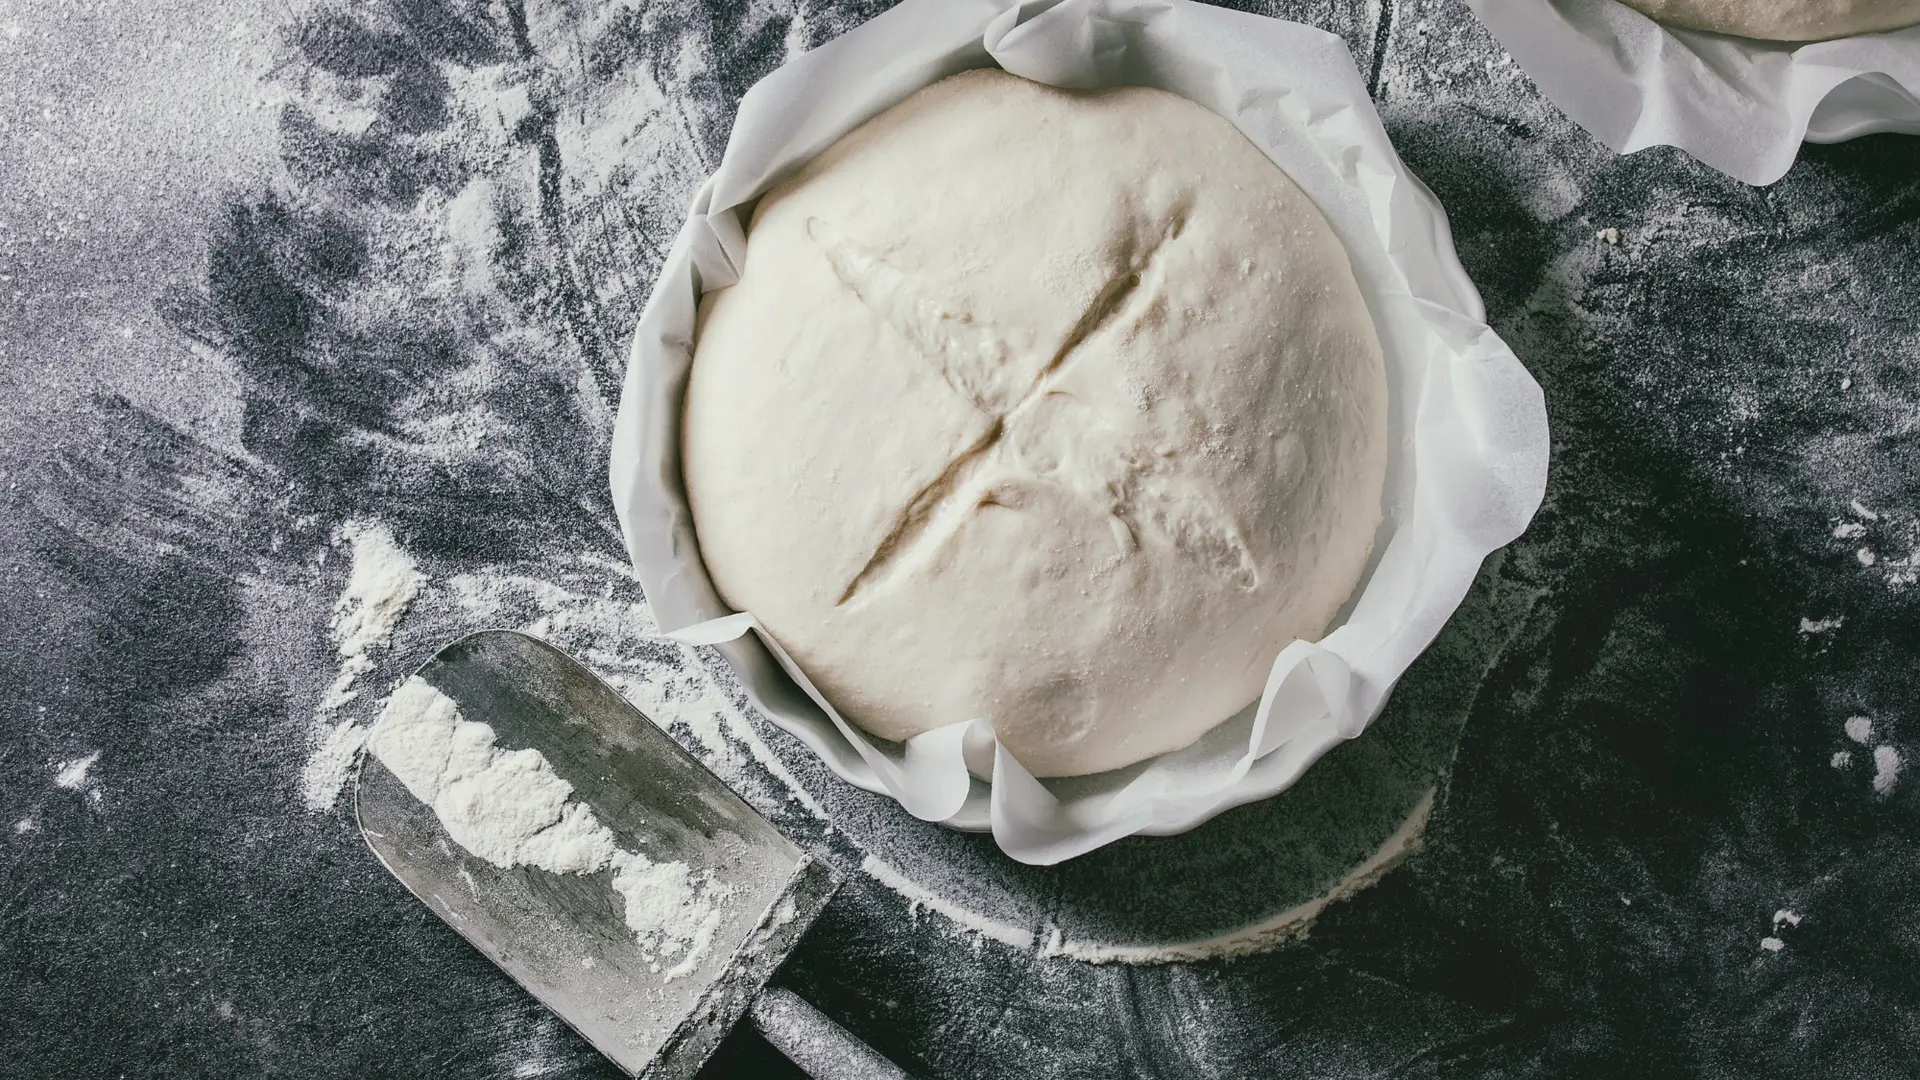
This is what the first sourdough starter looks like

From Day 2 to Day 4
After 24/36 hours, you will already notice the first signs of fermentation: the volume will not have increased much (at most about 1/2 times the initial volume), but there will be many bubbles on the surface of the dough, and you will already notice a characteristic smell of yeast (a bit spicy yet)

Once ready, remove the surface crust and take the middle part of the yeast. Weigh out the amount you want to refresh (I recommend carrying at least 200gr of yeast daily) and then knead it with:
- Flour: Equal weight of yeast
- Water: 43% of the flour’s weight
For example, if you want to refresh 200gr of starter, you will have to knead it with:
- 200gr of flour
- 86gr of cold water
I recommend you continue to use Wholemeal flour in this second refreshment and use good quality Bread Flour (ensuring the protein content is around 14%) for all subsequent refreshments.
Knead everything, put the dough in a container (maybe a measuring jug to follow the yeast development better), cover it with paper, and let it rest for at least 48 hours at 25°C. At the end of this period, you will already notice a slight dough growth (about 1.5 times its initial volume).
From now on, you will notice that after each refresh, the sourdough starter grows more and more after 24 hours, doubling (and more) on the fourth day.
If your starter is not so “strong,” don’t panic… It may just need a little more time!


48 comments available
Buongiorno! Sono al 5 giorno dalla preparazione del mio L.M. e dopo le 48 ore di rifresco fatto con farina semintegrale (era diventato il doppio!) ho rinfrescato con farina 00 forte ma dopo 12 ore sembra non crescere rispetto a prima: è colpa della farina? Perché? È a temperatura ambiente stabile 25 max 26 gradi coperto con garza. Grazie mille per i tuoi suggerimenti preziosissimi.
Ciao Loredana,
Quando cambi farina è normale che il lievito “rallenti” un pò. Continua a rinfrescarlo con farina 00 forte ogni 24ore, tenendolo sempre ad una temp ambiente intorno ai 24-25°C!
A presto!
Ciao biancolievito al terzo rinfresco il lievito appiccica alle mani potrebbe essere una buona idea aggiungere sale anche nei rinfreschi successivi?
Ciao Nicolò, in generale non ti consiglio di aggiungere il sale, una volta innescata la fermentazione.
Aggiungilo solo se la temperatura della stanza inizia a diventare piuttosto calda (sopra i 25°C).
Tieni conto che all’inizio è normale che il lievito abbia un’acidità sbilanciata ed avrà bisogno di alcuni giorni per assestarsi!
A presto
Buonasera. Domani sono 2 gg che ho iniziato a creare il LM( ho utilizzato una Tipo1 Biologica e 50% di idratazione) e si è formata una crosta liscia (come quando si lascia un impasto senza copertura) sulla superfice. La temperatura è sui 20/22gradi e mi chiedevo: quali sono gli indizi che posso fare il primo rinfresco? Questa crosta può inibire la formazione del LM? Grazie.
Ciao Luca,
all’inizio non vedrai uno sviluppo (o comunque molto limitato). Se provi ad annusare l’impasto, dovresti avvertire una nota acidula.
Dopo 2giorni a 20gradi è molto probabile che il tuo impasto sia pronto!
A presto!
Buongiorno,innanzitutto grazie per aver condiviso con noi queste ricette spiegate in maniera dettagliata! Mi sto cimentando con la preparazione del lievito madre ma ho avuto uno sviluppo “anomalo”:ieri ho effettuato il primo rinfresco (a 48 ore dalla prima preparazione)e questa mattina,dopo solo 12 ore,lo ritrovo più che raddoppiato..!ho usato per la preparazione iniziale farina di segale e per il rinfresco farina di tipo 1 (è l’unica che ho trovato con proteine pari al 15%). Mi chiedo se ho sbagliato qualcosa e nel caso come correggere ..grazie ancora
Ciao Valentina,
molto probabilmente dipende dal fatto che nel tuo lievito hai ancora una fortissima attività enzimatica portata dalla farina di segale e da quella di tipo 1.
Ti consiglio di usare una farina 00 di quelle adatte per Pane (al super le trovi con la dicitura “farina per pane”).
A presto!